
How to: Install Nomadlink Upfitters’ SoundShield Deadening and Alpine Speaker System Upgrade
We recently took on the project to upgrade our stock MB audio system. Our friend upgraded his van to the RoamRig Beatbox Blackbird and donated his JBL coaxial speakers for somewhat of an upgrade to our van. Although it was an upgrade, there was room for improvement, so we turned to the Sprinter power and audio experts, our friends Lance and Cecilia of Nomadlink Upfitters for help. If you're also considering an audio upgrade, we wanted to share our experience.
Nomadlink Upfitters has three audio upgrade options available at different price points:
Basic Alpine upgrade – This kit comes with Sprinter-specific component door speakers and an optional center channel balancer to lower the overpowering center channel. This DIY kit requires no splicing or crimping if OEM speakers are still in-place. The included Alpine speakers have Sprinter speaker-specific connectors already installed.
Enhanced Alpine System – Includes the basic kit plus an Alpine 8-Channel Digital Sound Processing (DSP) amplifier, amplifier harness, and an 8” enclosed subwoofer that goes in the passenger seat base, allowing for more sound customization and power. This kit is not DIY-friendly; contact Nomadlink to learn more about this kit and installation locations.
RoamRig Beatbox Blackbird – The premium kit includes an Audison 8” or ARC Audio 10” subwoofer (depending on Sprinter chassis), ARC Audio DSP Blackbird amplifier, subwoofer remote control, ARC Audio X2 6.2” component speakers, subwoofer enclosure, plug and play harness, power cables and hardware kit. This kit comes with everything required to install, and is DIY-friendly.
We decided on the basic upgrade, which retails for $649 and added on the $69 center channel balancer. We also opted for SoundShield deadening, which retails for $150 a roll (2 rolls recommended). Each roll covers 11 square feet, and 2 rolls is enough to deaden both front door panels and the floorboard of the Sprinter cab. If curious about the cost of the higher-grade kits, reach out to Nomadlink for current pricing.
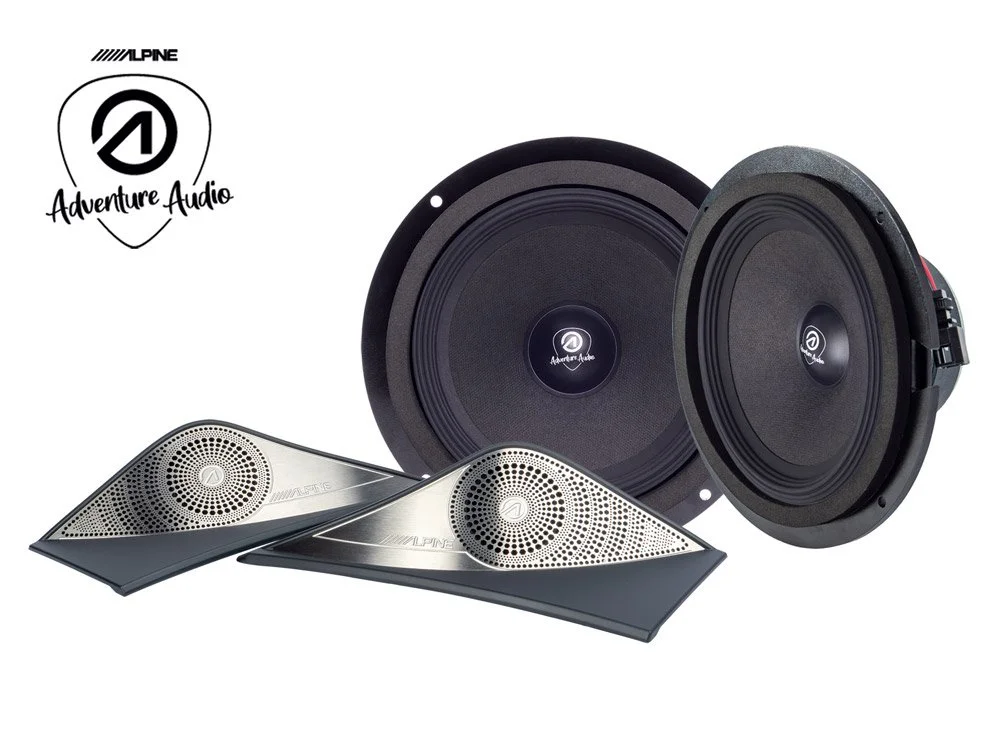

Source: https://www.alpine.co.uk/p/Products/sound-systems-for-mercedes/spc-106s907-2
NOTE - One thing to determine before purchasing your upgrade is if you have had the center speaker fix, a Technical Service Bulletin (TSB) performed at Mercedes. This speaker fix swaps the wires on the speaker plugs. If you have had this done, the center channel load balancer will be installed on the wrong connector and basically will load-balance the MB SOS speaker signal. My recommendation, if you have the TSB fix, is to just disconnect the white plug. If you have not had the speaker fix completed, you can try the load balancer and determine which configuration you prefer.
Installing the Basic Alpine Upgrade Kit
Tools Required:
#2 Phillips screwdriver
T20, T25, T30 Torx drivers
Pick tool to remove screw cover caps
Utility knife
Trim removal tools. I like these from Harbor Freight: https://www.harborfreight.com/nylon-pry-bar-installer-kit-4-piece-63594.html
Sound deadening applicator roller tool (many options available on Amazon for under $10)
2 rolls of Soundshield deadening material (each roll covers 11 sqft): https://nomadlinkupfitters.com/products/soundshield-sound-deadening-sheeting
Wire cutters/strippers/crimp connectors (if needed). NOTE: Since we already changed the door speakers to JBL coax speakers, we had to cut the factory speaker connector off and used new spade terminal connectors. If this applies to you, you can unclip and de-solder the MB connectors on the Alpine speakers and use spade connectors.
Installation Times
Speaker install time: about 2 hours
SoundShield deadening install time: about 4 hours (optional)
Removing Door Panels
There is a pretty good video for removing the Sprinter door panels on YouTube, check it out here: https://youtu.be/TxBDSUJw2dE?si=0bNl9IkD1Y_q6rET. Re-installation will be reverse order.
Removing the Front Floor Mat
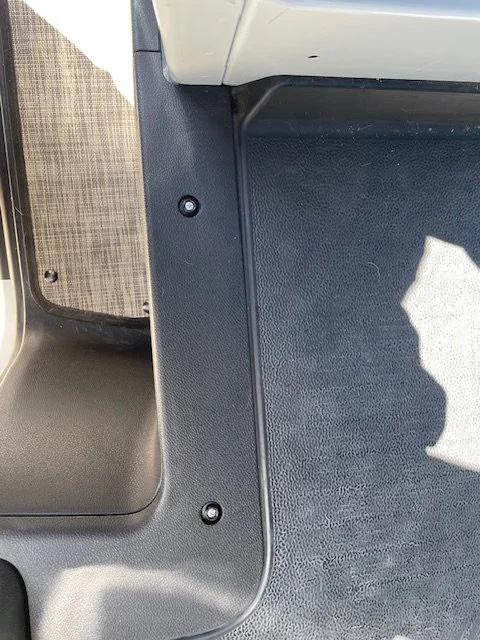
Remove the step trim corner trim in the driver and passenger door well, 2 screws (either #2 Phillips with Inhabit mats, or Torx without Inhabit mats).
Carefully lift and remove the floor covering and set aside.
Installing the Door Speakers
Lay down towels to prevent scratching panels. Place the door panel on a horizontal surface.
Remove the 4 T20 screws holding the OEM speaker in place, set speaker aside.
Position the Alpine speaker into the mount, lining up the logo to be parallel with the bottom of the door panel.
Reinstall the 4 screws to secure speaker to door panel.
If not applying SoundSheild, reinstall door panels.

Installing the Dash Tweeters
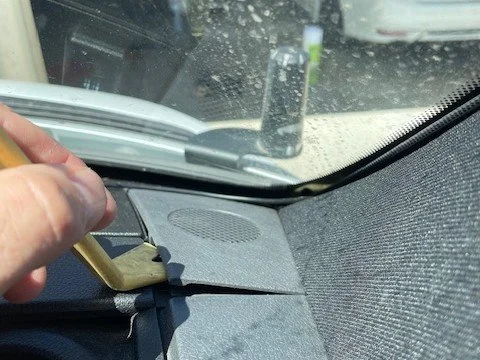
Using a trim tool, lift/pry up on tweeter grill covers in dash corners.
Using the provided tweeter removal hook, hook the OEM tweeters and pull up to remove.
Unplug OEM tweeters and set aside.
Remove the Alpine tweeter protective plastic cover and install the Alpine tweeter into the Alpine grill cover by pressing them in.
Wrap the tweeter filter with provided sticky foam (to prevent rattles)
Plug in new harness into the dash harness, tuck wiring into speaker pocket.
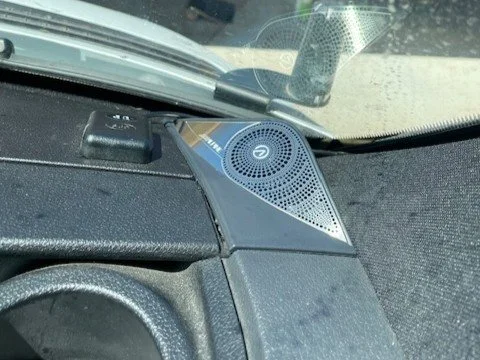
Position and press new tweeter/tweeter grills into place.
Installing the Center Channel Load Balancer
NOTE: Before proceeding, re-read the note above about the center channel load balancer. If you had the TSB fix completed, we recommend just unplugging the white connector. If you have not had the TSB fix completed, install the load balancer (on the black plug) and see how it sounds unplugged and plugged in.
Using a trim tool, pry up on the center speaker grill.
Pull up on the center speaker, held in by pressure tabs.
If installing the load balancer, unplug the black plug and insert inline and tuck into cavity.
If not installing the load balancer, either unplug the white plug (TSB fix) or the black plug (non-TSB applied).
Reinstall center grill.
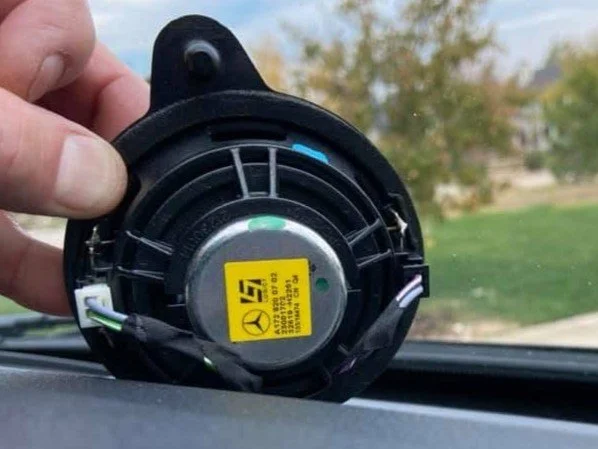
In this photo, the green/gray wires are inserted in the white plug. This speaker has not had the TSB completed. The purple/grey wires are the radio sound signal. If the purple wire is in the white plug, the TSB has been completed.
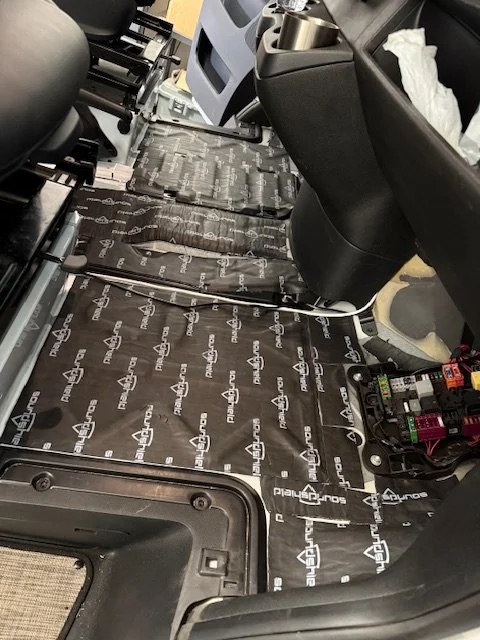
Installing SoundShield
NOTE: Nomadlink recommends doing the door panels first then the floor, but you can do it in either order. We did it as they recommend and also purchased a roller tool to facilitate install and promote adhesion.
Clean the door panels and floorboard. You can use a towel with soap and water, then wipe with isopropyl alcohol to get any dust/oil off the panel. Allow to dry.
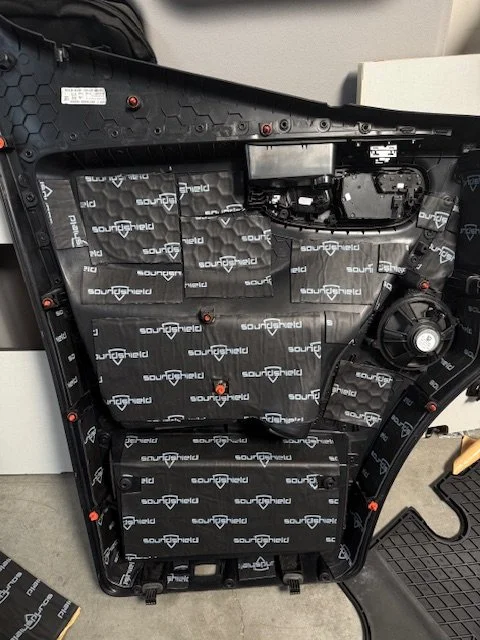
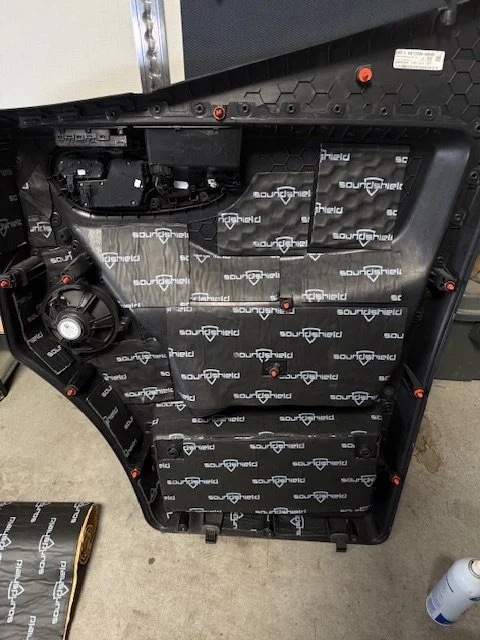
Measure the larger areas first, and cut the larger pieces of Soundshield to do those areas first, then piecemeal smaller trimmings/pieces into tighter areas. Peel the backing off the Soundshield, lay it down and use the roller to adhere it. Refer to the door panel pictures. Complete both door panels.
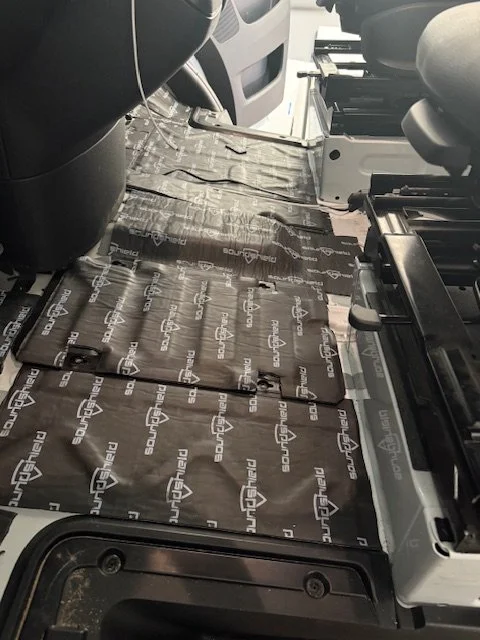
The floorboard area is a bit easier. Again, starting with the driver's floor area, then the passenger's, and use the remaining piece to cover the battery plate, using the roller to adhere it to the surface. Use any left over pieces to fill in other areas. Trim the battery plate with a utility knife to allow easy removal in the future.
Once done, reinstall the floor covering and the trim pieces to hold in place.
First Impressions
During install, David discovered an issue with the load balancer being on the wrong wire since we had the speaker TSB fix completed. The center speaker was still too bright and over powering. When he went to unplug it, he found an SOS light illuminated on the dash. He ended up just leaving the center speaker wire unplugged and removed the load balancer completely from the other plug.
The new angled tweeters bring the sound stage closer to the driver and passenger instead of bouncing it off the windshield. The highs are crisper and less tangy as they are being properly filtered. The door speakers have more punch and fuller mid-range sound, even more so with the SoundShield installed, and an added benefit to the SoundShield is that it also helps in reducing road noise.
For about $1k, you can make music much more enjoyable on your drive. This kit is for you if you want a solid improvement without completely breaking the bank. The other great part about this kit is it is easily DIYable in a few hours, although David recommends budgeting a full day if adding SoundShield.
If you crave more bass, jumping up to the Enhanced Kit may be better for you with the added digital signal processing, amplified speakers and enclosed subwoofer.
If you are a true audio fanatic, the RoamRig Beatbox Blackbird is the flagship upgrade, but comes with a higher cost. It is a very well-engineered kit that uses high-end components, impressing everyone who hears it in-person.
Reach out to Nomadlink Upfitters at https://nomadlinkupfitters.com/pages/contact-us and see what they recommend to fit your needs and budget, or find a van owner with an audio upgrade and hear it for yourself before you decide.